1 . 영화 디테일 페이지 작성
@Test
@DisplayName("영화 정보에 관한 디테일한 내용을 얻어옵니다.")
public void getMovieDetails() {
    ResponseEntity<ApiResponseDetailsMovie> entity = rt.getForEntity("https://api.themoviedb.org/3/movie/643?append_to_response=string&language=ko-KR&api_key=" + apikey, ApiResponseDetailsMovie.class);
    ApiResponseDetailsMovie body = entity.getBody();
    System.out.println(body);
}
해당 api가 잘 작동하는지 확인해준다. 테스트를 돌려봤을때 아래처럼 결과가 정상적으로 나오는 것을 확인 할 수 있다.

그러면 해당 API가 영화에 대한 디테일한 값을 가져오는 것을 확인했으니 이제 구체적인 페이지를 만들어본다.
페이지를 만들 때는 Bootstrap Card를 이용해준다. 아래와 같이 작성 후 돌려보면
### details.html
<!DOCTYPE html>

<html lang="ko" xmlns:th="http://www.thymeleaf.org">
<head th:replace="~{Part/header :: header}">
</head>
<nav th:replace="~{Part/navbar :: navigation}"></nav>
<body>


<div class="border border-dark">
    <div class="card" style="width: 18rem;">
        <img src="..." class="card-img-top" alt="...">
        <div class="card-body">
            <h5 class="card-title">Card title</h5>
            <p class="card-text">Some quick example text to build on the card title and make up the bulk of the card's content.</p>
            <a href="#" class="btn btn-primary">Go somewhere</a>
        </div>
    </div>
</div>
</body>
</html>
아래와 같이 카드가 나오는 것을 확인할 수 있다. 그러면 이제 사진을 리스트에서 나오는 것처럼 사진을 넣어준다.

아래와 같이 코드를 작성해준다.
## details.html
<!DOCTYPE html>

<html lang="ko" xmlns:th="http://www.thymeleaf.org">
<head th:replace="~{Part/header :: header}">
</head>
<nav th:replace="~{Part/navbar :: navigation}"></nav>
<body>


<div class="border border-dark">
    <div class="card mb-3">
        <td>
            <img th:src="${address + posterPath}" width="300" height="300">
        </td>
        <div class="card-body">
            <h5 class="card-title">Card title</h5>
            <p class="card-text">This is a wider card with supporting text below as a natural lead-in to additional content. This content is a little bit longer.</p>
            <p class="card-text"><small class="text-body-secondary">Last updated 3 mins ago</small></p>
        </div>
    </div>

</div>
</body>
</html>

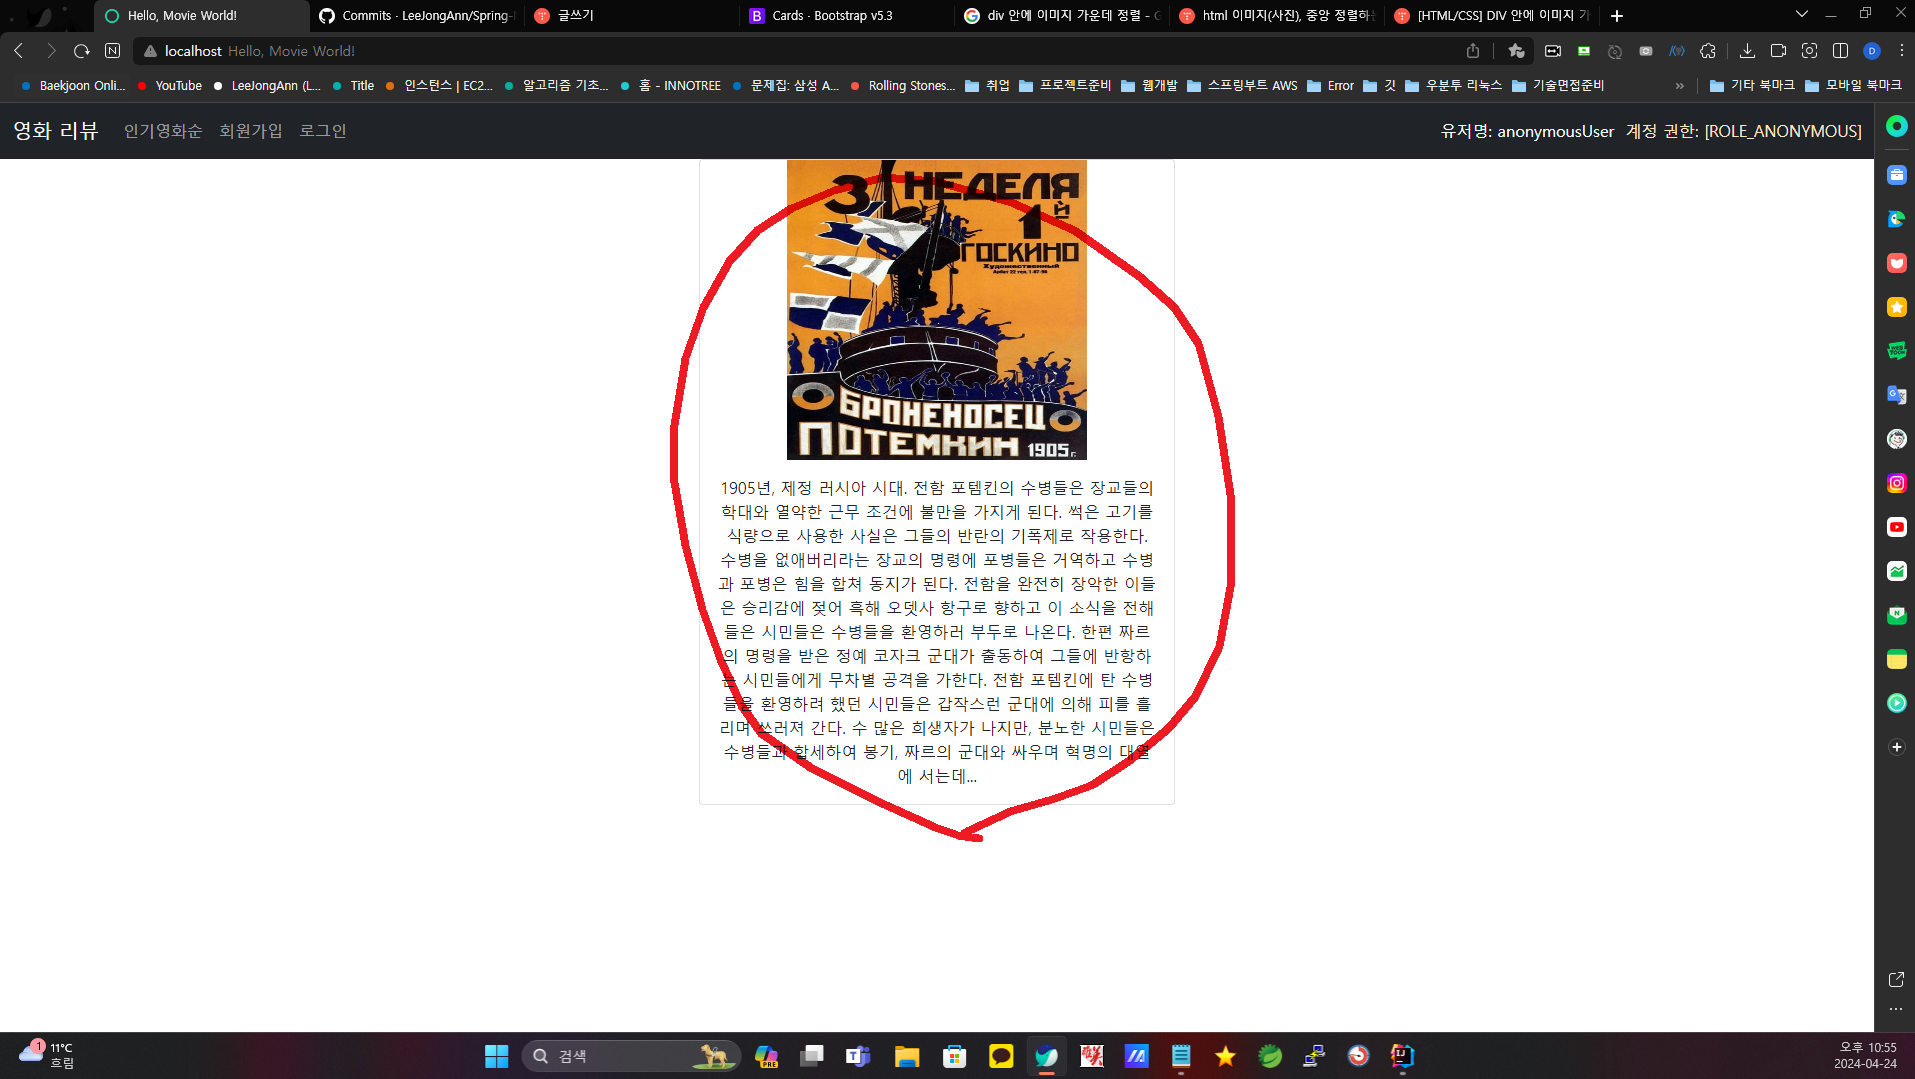
이미지 불러오는 부분에 디테일 ID의 주소를 추가했다. 그리고 사진 크기는 리스트에 있던 300으로 진행하면 아래와 같이 나온다.

사진을 가져왔으니 , 이제 나머지 값들을 다 뿌려주면 된다.
일단은 이렇게 진행했다. 나중에 값들을 더 추가할 것 인데
내일 라섹 수술 예정이라 일주일 간 회복하고 다시 작업 할 수 있도록 하겠다.
## details.html
<!DOCTYPE html>

<html lang="ko" xmlns:th="http://www.thymeleaf.org">
<head th:replace="~{Part/header :: header}">
</head>
<nav th:replace="~{Part/navbar :: navigation}"></nav>
<body>

<div class="container" style="width: 500px; height: 600;">

    <div class="card text-center">
        <div style="text-align: center">
            <img th:src="${address + posterPath}" width="300" height="300">
        </div>
        <div class="card-body">
            <p class="card-text" th:text="${movieDetails.getOverview()}"></p>
        </div>
    </div>

</div>

</body>
</html>'자바의 봄(Spring) > 프로젝트' 카테고리의 다른 글
| SpringBoot-Movie-Thymeleaf-Project - 11 영화 디테일 페이지 만들기 ( 2 ) (0) | 2024.05.01 |
|---|---|
| SpringBoot-Movie-Thymeleaf-Project - 10 Thymeleaf에서 javascript 함수 사용하기 (0) | 2024.04.14 |
| SpringBoot-Movie-Thymeleaf-Project - 8 api로 받아온 데이터 페이징 처리 해주기 (0) | 2024.04.07 |
| SpringBoot-Movie-Thymeleaf-Project - LocalDateTime 으로 시간 포맷 변경하기 (0) | 2024.04.06 |
| SpringBoot-Movie-Thymeleaf-Project - 7 게시글 작성하기 (0) | 2024.04.05 |


댓글